Spark数据传输原理
一、Spark中数据传输的种类
1、Shuffle远程数据读取
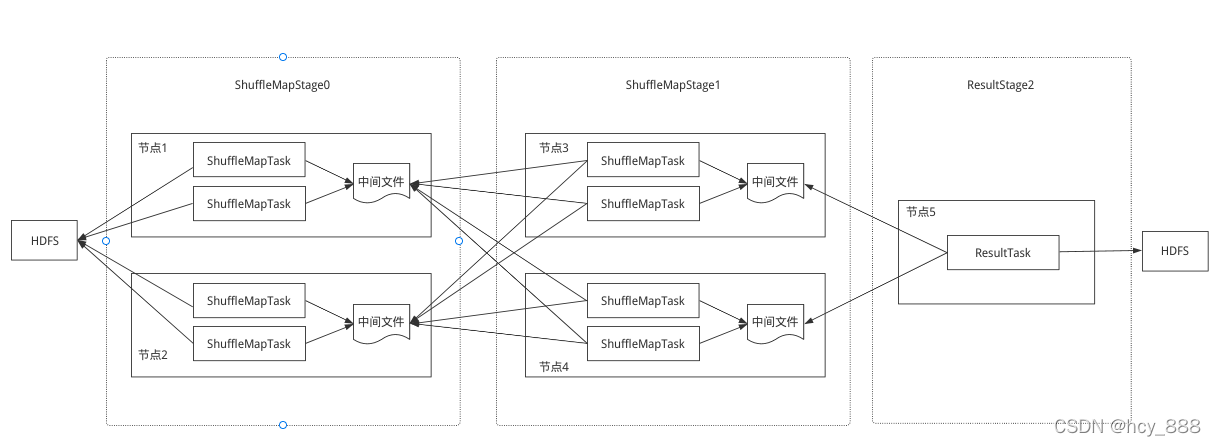
在DAG调度的过程中,每一个job提交后都会生成一个 ResultStage和若干个ShuffleMapStage,根据shuffle划分。存在shuffle时,会存在跨节点的数据文件传输。
2、driver、executor等组件进程间通信
运行时消息通信:

Executor进程CoarseGrainedExecutorBackend相关消息处理:

3、文件上传下载
SparkContext 调用addFile()和addJar()
二、网络通信框架
1、基于netty的网络编程框架
netty是一个高性能、异步事件驱动的NIO框架,除了spark有大量开源框架用起作为通信组件,如Flink、Dubbo、RocketMQ、Pulsar、Es、gRPC、avro、OpenTSD、Cassandra等。
spark基于它封装出了自己的network-common模块,供上层rpc框架和内核模块调用。
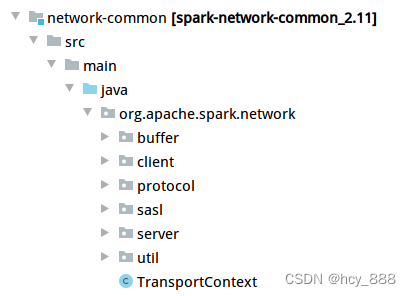
如创建TransportServer:

协议Message根据请求响应可以划分为RequestMessage和ResponseMessage两种;对于Response,根据处理结果,可以划分为Failure和Success两种类型;根据功能的不同,主要划分为Stream,ChunkFetch,Rpc。

StreamRequest,请求获取字节流,如文件的上传下载,如driver把jar文件传给worker。RpcRequest和OneWayMessage主要针对Rpc调用,前者是可带响应而后者只是单项请求。ChunkFetchRequest,请求获取流的单个块,主要用在shuffle获取文件块。
请求响应流如图:
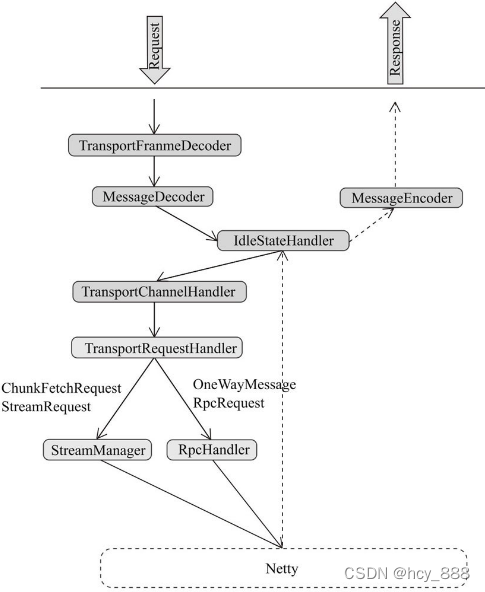
请求和响应消息的处理如下:

private void processFetchRequest(final ChunkFetchRequest req) {ManagedBuffer buf;buf = streamManager.getChunk(req.streamChunkId.streamId, req.streamChunkId.chunkIndex);respond(new ChunkFetchSuccess(req.streamChunkId, buf)).addListener(future -> {streamManager.chunkSent(req.streamChunkId.streamId);});
}private void processRpcRequest(final RpcRequest req) {rpcHandler.receive(reverseClient, req.body().nioByteBuffer(), new RpcResponseCallback() {@Overridepublic void onSuccess(ByteBuffer response) {respond(new RpcResponse(req.requestId, new NioManagedBuffer(response)));}@Overridepublic void onFailure(Throwable e) {respond(new RpcFailure(req.requestId, Throwables.getStackTraceAsString(e)));}});
}
2、RPC模块
自Spark 2.0后已经把Akka这个RPC框架剥离出去了(详细见SPARK-5293),原因是很多用户会使用Akka做消息传递,那么就会和Spark内嵌的版本产生冲突,而Spark也仅仅用了Akka做rpc,所以2.0之后,基于上述network-common模块实现了一个类似Akka Actor模型的rpc。
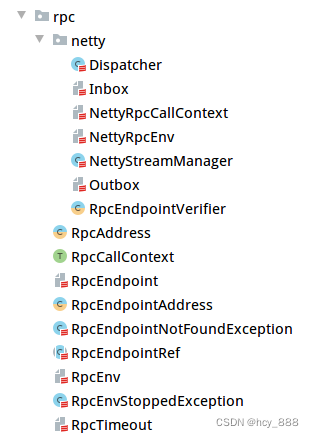
主要类如下:
RpcEndpoint:模拟Actor,是一个可以响应请求的服务终端。
def receive: PartialFunction[Any, Unit] = {case _ => throw new RpcException(self + " does not implement 'receive'")
}def receiveAndReply(context: RpcCallContext): PartialFunction[Any, Unit] = {case _ => context.sendFailure(new RpcException(self + " won't reply anything"))
}
RpcEndpointRef:模拟ActorRef,RpcEndpoint的引用,作为客户端发起请求的入口。
RpcEnv:模拟ActorSystem,提供运行环境,封装NettyRpcEnv
// 注册endpoint,必须指定名称,客户端路由就靠这个名称来找endpoint
def setupEndpoint(name: String, endpoint: RpcEndpoint): RpcEndpointRef // 拿到一个endpoint的引用
def setupEndpointRef(address: RpcAddress, endpointName: String): RpcEndpointRef
使用示例:第一步,定义一个HelloEndpoint继承自RpcEndpoint。
class HelloEndpoint(override val rpcEnv: RpcEnv) extends RpcEndpoint {override def onStart(): Unit = {println("start hello endpoint")}override def receiveAndReply(context: RpcCallContext): PartialFunction[Any, Unit] = {case SayHi(msg) => {println(s"receive $msg")context.reply(s"hi, $msg")}case SayBye(msg) => {println(s"receive $msg")context.reply(s"bye, $msg")}}override def onStop(): Unit = {println("stop hello endpoint")}
}
case class SayHi(msg: String)
case class SayBye(msg: String)
第二步,把刚刚开发好的Endpoint交给Spark RPC管理其生命周期,用于响应外部请求。
val config = RpcEnvServerConfig(new RpcConf(), "hello-server", "localhost", 52345)
val rpcEnv: RpcEnv = NettyRpcEnvFactory.create(config)
val helloEndpoint: RpcEndpoint = new HelloEndpoint(rpcEnv)
rpcEnv.setupEndpoint("hello-service", helloEndpoint)
rpcEnv.awaitTermination()
第三步,开发一个client调用刚刚启动的server。
val rpcConf = new RpcConf()
val config = RpcEnvClientConfig(rpcConf, "hello-client")
val rpcEnv: RpcEnv = NettyRpcEnvFactory.create(config)
val endPointRef: RpcEndpointRef = rpcEnv.setupEndpointRef(RpcAddress("localhost", 52345), "hell-service")
val future: Future[String] = endPointRef.ask[String](SayHi("neo"))
future.onComplete {case scala.util.Success(value) => println(s"Got the result = $value")case scala.util.Failure(e) => println(s"Got error: $e")
}
Await.result(future, Duration.apply("30s"))
在Spark内部,很多的Endpoint以及EndpointRef与之通信都是通过这种形式的,举例来说比如driver和executor之间的交互用到了心跳机制,使用HeartbeatReceiver来实现,这也是一个Endpoint,它的注册在SparkContext初始化的时候做的,代码如下:
_heartbeatReceiver = env.rpcEnv.setupEndpoint(HeartbeatReceiver.ENDPOINT_NAME, new HeartbeatReceiver(this))而它的调用在Executor内的方式如下:
val message = Heartbeat(executorId, accumUpdates.toArray, env.blockManager.blockManagerId)
val response = heartbeatReceiverRef.askWithRetry[HeartbeatResponse](message, RpcTimeout(conf, "spark.executor.heartbeatInterval", "10s"))
Spark内部的一些Endpoint,如图:

实现原理:

1、请求包括数据层面的chunk请求和控制层面的rpc请求。chunk请求会被StreamManager处理,rpc 请求会进一步通过Dispatcher分发给合适的endpoint。返回结果通过channel 返回给发送端。
2、RpcEndpointRef可以是本地的RpcEndpoint的简单包装也可以是远程RpcEndpoint 的代表。当RpcEndpoint 发送给 RpcEndpointRef 时,如果这个 RpcEndpointRef 是本地 RpcEndpointRef,则事件消息会被Dispatcher做进一步分发。如果是远程消息,则事件会被进一步封装成OutboxMessage,进而通过本地TransportClient将这个消息通过channel 发送给远程的RpcEndpoint。
三、shuffle场景分析
1、shuffle write
shuffle write主要有3种实现,这里介绍下排序实现。

在该模式下,使用 PartitionedAppendOnlyMap 或者 PartitionedPairBuffer 在内存中进行排序, 排序的 K 是(partitionId, hash(key)) 这样一个元组。如果超过内存 limit, spill溢写到一个文件中,最后对之前所有的输出文件和当前内存中的数据结构中的数据进行merge sort, 进行全局排序,将全部结果写到一个数据文件中,同时生成一个索引文件。

2、shuffle read
当让一个stage的任务完成后会触发下一个stage的任务,从此stage的最后一个rdd计算沿着血缘找到第一个rdd为ShuffledRDD执行compute()方法。

然后使用ShuffleBlockFetcherIterator获取本地或远程节点上的block并转化为流,最终返回一小部分数据的迭代器,随后序列化、解压缩、解密流操作被放在一个迭代器中该迭代器后执行,然后添加了监控相关的迭代器、数据聚合相关的迭代器、数据排序相关的迭代器等等。在数据聚合和排序阶段,大数据量被不断溢出到磁盘中,数据最终还是以迭代器形式返回,确保了内存不会被大数据量占用。
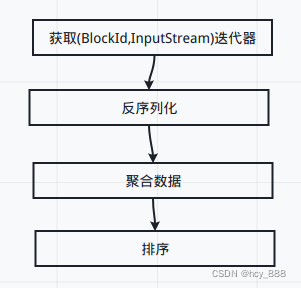
重点看下ShuffleBlockFetcherIterator获取输入流,主要分以下几步:
1、获取数据的meta信息,block所在的位置,以及对应的block信息和大小
mapOutputTracker.getMapSizesByExecutorId(handle.shuffleId, startPartition, endPartition)2、 splitLocalRemoteBlocks 进行划分读取数据的方式:本地读取 or 远程读取
3、远程读取交给NettyBlockTransferService,有一个TransportServer来构成节点收发信息的端点。同时会有一个RpcHandler,来根据不同的信息类型处理不同的请求。

4、rpcHandler接收发来的openBlocks请求并交由blockManager获取block

本文来自互联网用户投稿,文章观点仅代表作者本人,不代表本站立场,不承担相关法律责任。如若转载,请注明出处。 如若内容造成侵权/违法违规/事实不符,请点击【内容举报】进行投诉反馈!