银河麒麟服务器v10 sp1 安装 nginx
首先查询是否安装:

root@xxx-pc:~# ps -ef |grep nginx
或
root@xzx-pc:~# dpkg -list|grep nginx
如果安装请先卸载,或者直接使用,以下步骤你就可以忽略了,软件包的卸载方法:
1、APT方式
(1)移除式卸载:apt-get remove softname1 softname2 …;(移除软件包,当包尾部有+时,意为安装)
(2)清除式卸载 :apt-get --purge remove softname1 softname2...;(同时清除配置)
清除式卸载:apt-get purge sofname1 softname2...;(同上,也清除配置文件)
2、Dpkg方式
(1)移除式卸载:dpkg -r pkg1 pkg2 ...;
(2)清除式卸载:dpkg -P pkg1 pkg2...;
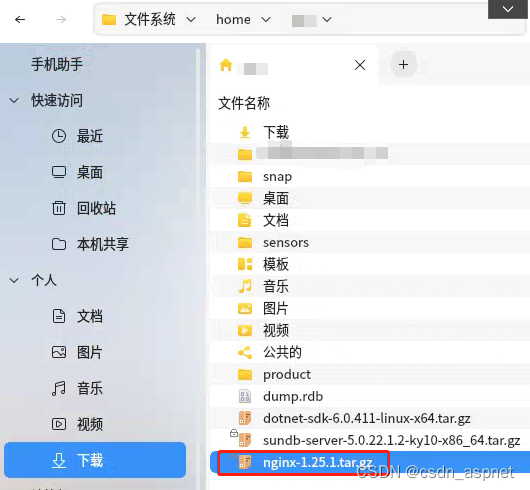
1、下载nginx安装包,并上传至服务器
nginx download

2.如果缺少依赖,可先解决依赖包pcre安装,本文并没有安装依赖
命令如下:
sudo apt-get install libpcre3 libpcre3-dev
解决依赖包zlib安装,命令:
sudo apt-get install zlib1g-dev
解决依赖包openssl安装,命令:
sudo apt-get install openssl libssl-dev
3.解压
.tar.gz文件、 .tgz文件解压:
tar -zxvf filename.tar.gz               # 解压
tar -zcvf filename.tar.gz dirname       # 将dirname和其下所有文件(夹)压缩
tar -C dirname -zxvf filename.tar.gz    # 解压到目标路径dirname
[root@node0 apps]# pwd
/opt/apps
[root@node0 apps]# ls
nginx-1.25.1.tar.gz
[root@node0 apps]# tar -zxvf nginx-1.25.1.tar.gz
[root@node0 apps]# cd nginx-1.25.1
本文实际解压路径:

按个人喜好解压自定义目录即可。
4.通过配置configure生成make工程
在执行./configure时报如下错误:
checking for pkg-config... no
pkg-config not found
configure: error: Please reinstall the pkg-config distribution
提示,配置错误,请重新安装pkg配置分发。
解决方法,根据提示,安装pkg-config:
sudo apt-get install pkg-config
查看可配置参数
# ./configure --help

--prefix : Nginx 安装目录。注意,安装目录与解压目录不一样
--sbin-path : Nginx 命令文件
--modules-path : Nginx 模块存放路径
--conf-prefix : Nginx 配置文件存放路径
--pid-path : Nginx 的进程 id 文件
--error-log-path :错误日志文件 --http-log-path : http 访问日志文件
查看可安装插件(默认不安装)
./configure --help |grep with-

查看可卸载插件(已安装)
./configure --help |grep without-

常规安装配置
(反斜杠是换行,但是仍属于同一条指令)
./configure \
--prefix=/usr/local/nginx \
--pid-path=/usr/local/nginx/logs/nginx.pid \
--error-log-path=/usr/local/nginx/logs/error.log \
--http-log-path=/usr/local/nginx/logs/access.log \
--with-http_ssl_module \
--with-http_gzip_static_module \
--http-client-body-temp-path=/var/temp/nginx/client \
--http-proxy-temp-path=/var/temp/nginx/proxy \
--http-fastcgi-temp-path=/var/temp/nginx/fastcgi \
--http-uwsgi-temp-path=/var/temp/nginx/uwsgi
本文实际使用:
./configure --prefix=/usr/local/nginx --with-http_stub_status_module --with-http_ssl_module --with-http_v2_module
编译并安装
make 编译成功之后,make install

查看安装目录/usr/local/nginx
cd /usr/local/nginx

conf 目录
Nginx 所有配置文件的目录,极其重要。在该目录中包含一个 nginx.conf 配置文件。
html 目录
Nginx 的默认站点目录。
logs 目录
存放 Nginx 的日志文件。 access.log error.log
sbin 目录
Nginx 命令的目录,如 Nginx 的启动命令。
5.nginx的开启
查看防火墙状态
[1]systemctl status firewalld.service
[2]systemctl list-unit-files |grep firewalld
停止防火墙,系统重启后会重新打开
systemctl stopfirewalld.service
金庸防火墙,系统重启后不会重新打开
systemctl disable firewalld.service
 在失去防火墙之后,可以运行nginx
cd sbin/
./nginx
查看nginx进程(process=ps)运行状态
ps aux|grep nginx
本文已将安全中心-网络保护-防火墙,点击右侧按钮关闭:

直接启动命令:
root@xxx-pc:/usr/local/nginx-1.25.1# sudo /usr/local/nginx/sbin/nginx
访问,nginx默认配置监听80端口:

关闭Nginx
1. 立即终止服务
这种方法比较强硬,无论进程是否在工作,都直接停止进程。
# ./nginx -s stop
2. 从容退出服务
这种方法较 stop 相比就比较温和一些了,需要进程完成当前工作后再停止。
./nginx -s quit
3. killall 方法杀死进程
直接杀死进程,在上面无效的情况下使用,态度强硬,简单粗暴!绝杀!
killall nginx
至此nginx安装完成了。
下一篇:银河麒麟服务器v10 sp1 nginx开机自动启动_csdn_aspnet的博客-CSDN博客
本文来自互联网用户投稿,文章观点仅代表作者本人,不代表本站立场,不承担相关法律责任。如若转载,请注明出处。 如若内容造成侵权/违法违规/事实不符,请点击【内容举报】进行投诉反馈!